This tutorial will guide you through the process of migrating a Discourse forum to a new server. I will cover the steps necessary to backup the current forum, prepare the new server, and restore the backup to the new server.
Additionally, I will also discuss the DNS configuration, and how to make sure that your users are not impacted during the migration process. By the end of this tutorial, you will have successfully migrated your Discourse forum to a new server. 🙂
Let’s see, how I migrated my Discourse from Vultr (old Server) to DigitalOcean (new Server)…
Prerequisite details
- Access to old Discourse admin account
- Access to domain DNS manager
- SSH Credentials of old and new server
- Transactional E-mail services login credentials.
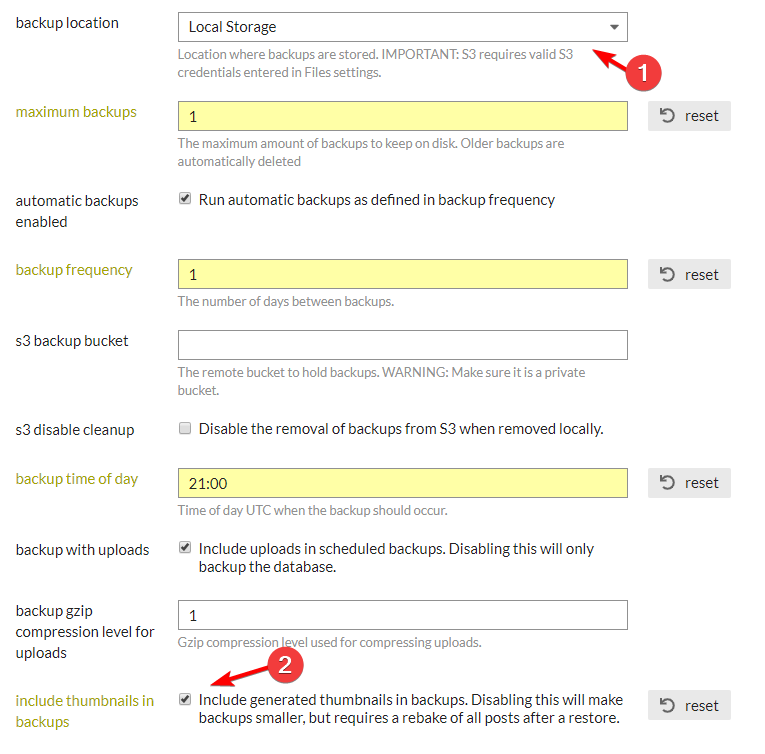
Step 1. Create a Local Backup of old Discourse
First off, set Local Storage and must include thumbnails in Backups settings. Without this step, I had really horrible experience. I learned this hard way.
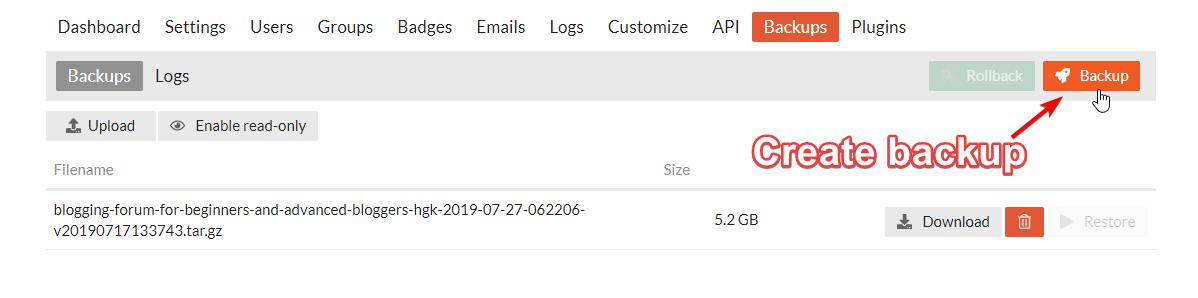
Create Backup
Step 2. Sign up at DigitalOcean 🎉
🎁 You will get $200 credits for 60 days.
DigitalOcean is used by top brands such as wpmudev, ghost, GitLab, 3CX, Slack, etc
Step 3. Create a New Droplet at DigitalOcean
- Choose an Image > Distribution: Ubuntu 20.04×64
- Choose a plan > Shared CPU (Basic)
- CPU Options > Premium AMD with NVMe SSD
- Plan: 1 GB / 1 AMD CPU, 25 GB NVMe SSDs, 1000 GB transfer
- Choose a datacenter region > Banglore, India
- Authentication: SSH Keys is a recommended way. Select existing Public Key or generate new via PuTTyGen
- Select Additional options: Enable backup (Optionally recommended)
- Hostname: Discourse
- Click on Create Droplet
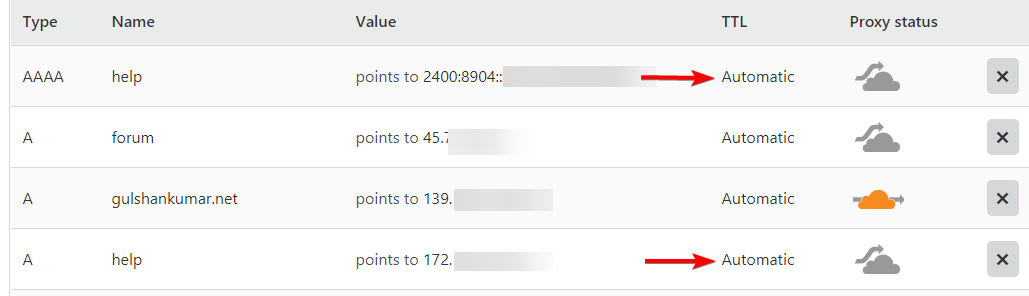
Step 4. Point domain to DigitalOcean Server IP
- Use A type record for the IPV4 address
- Use AAAA type record for the IPV6 address (Optional)
Step 5. Install Discourse at DigitalOcean
Please refer to these steps and install a new Discourse.
- Connect to new Server using SSH, PuTTy on Windows.
- Install Docker / Git
- Install Discourse
- Keep your e-mail credentials ready
- Setup Discourse Configuration
- This process may take up to 5 minutes.
- Confirm e-mail
- Login to new Discourse
Step 6. Go to Discourse Settings
Enable Allow Restore.
cd /var/discourse
./launcher enter app
discourse enable_restore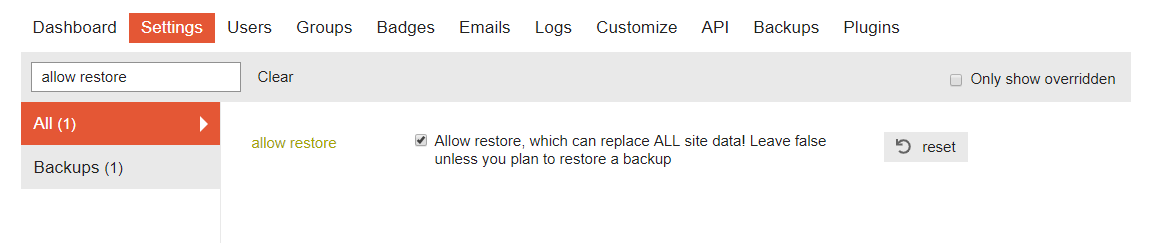
Step 7. Migrate Backup file.
Connect to old server via SSH, go to backup location
cd /var/discourse/shared/standalone/backups/default & vdirNow, you will see a backup file in tar.gz format. Note down file name.
blogging-forum-for-beginners-and-advanced-bloggers-hgk-2019-07-27-062206-v20190717133743.tar.gz- You need to use same file name with below SCP command.
- Also, replace 192.168.1.1 to your own new server IP.
- Use SCP command to copy file from old to new Cloud Server.
scp *.tar.gz root@192.168.1.1:/var/discourse/shared/standalone/backups/defaultIt will output like this
The authenticity of host '192.168.1.1 (139.180.139.234)' can't be established.
 ECDSA key fingerprint is SHA256:WTiKVipml0QKCjAzFyk6/fEh8/MI8K8vtv+2QZ54sc0.
Are you sure you want to continue connecting (yes/no)?- Type yes and press enter key.
- Then, Enter password
Hint: (Do right click to enter password. Press Enter. It will be invisible, don’t worry)
Step 8. Login to new Discourse
- Go to Backups, now you will see your backup file 😄
- Restore the file which we brought from old server
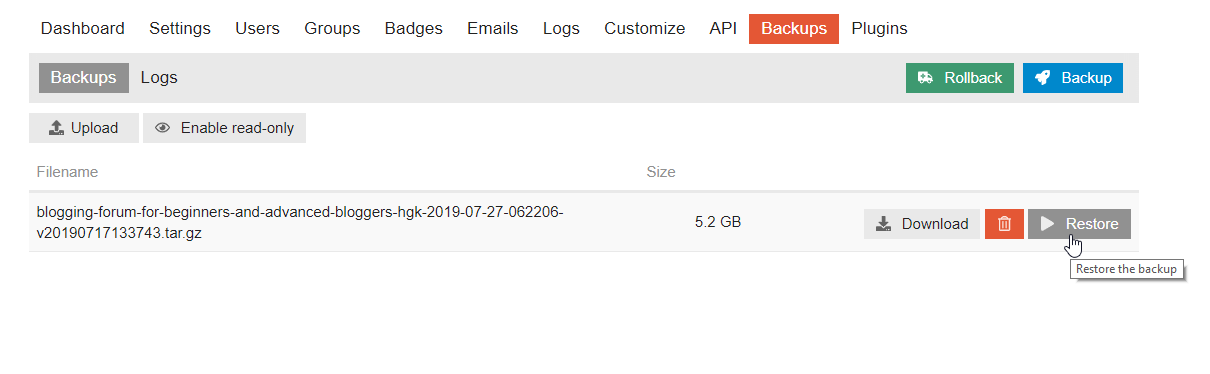
Important Note: It is recommended to do restore via Terminal.
cd /var/discourse
./launcher enter app
discourse restore blogging-forum-for-beginners-and-advanced-bloggers-hgk-2019-07-27-062206-v20190717133743.tar.gz
Step 9. Enable outgoing e-mails

🎉 Congrats! You are done! 😊
Using S3 was costly for me. This is the most affordable and easiest way I can think off.
This process doesn’t need any local download or upload. You can save your Internet data this way.
If you liked this do share, or any question? Let me know below.
Reference: Backup / Restore Discourse from Command Line – Meta
